
One of the annoying features of the asset picker within SharePoint is the inability to restrict which sites and libraries show up within the left hand navigation window so you can’t restrict what users see and what they can select – also the fact the “add” item link is so small!
Here we’ll look at modifying this to make it more user friendly
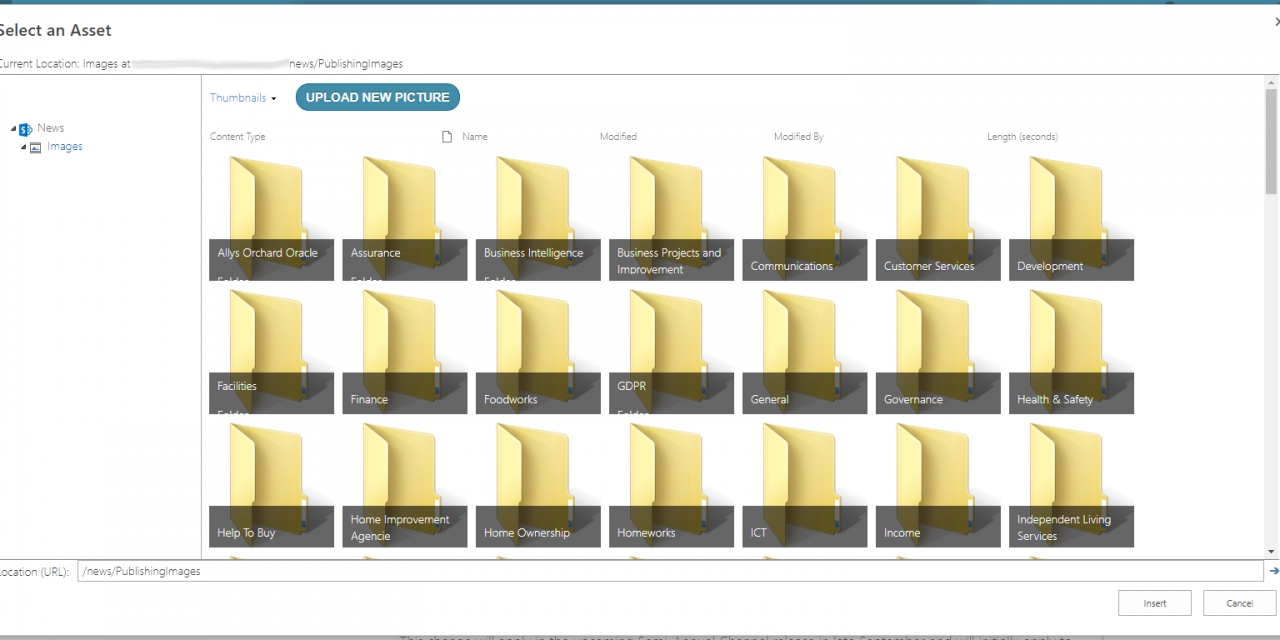
You’ll notice from the picture below that pointing an asset picker to the site https://mytenancy.sharepoint.com/news/ leads to all of the libraries and subsites of this site being shown in the left hand navigation menu:
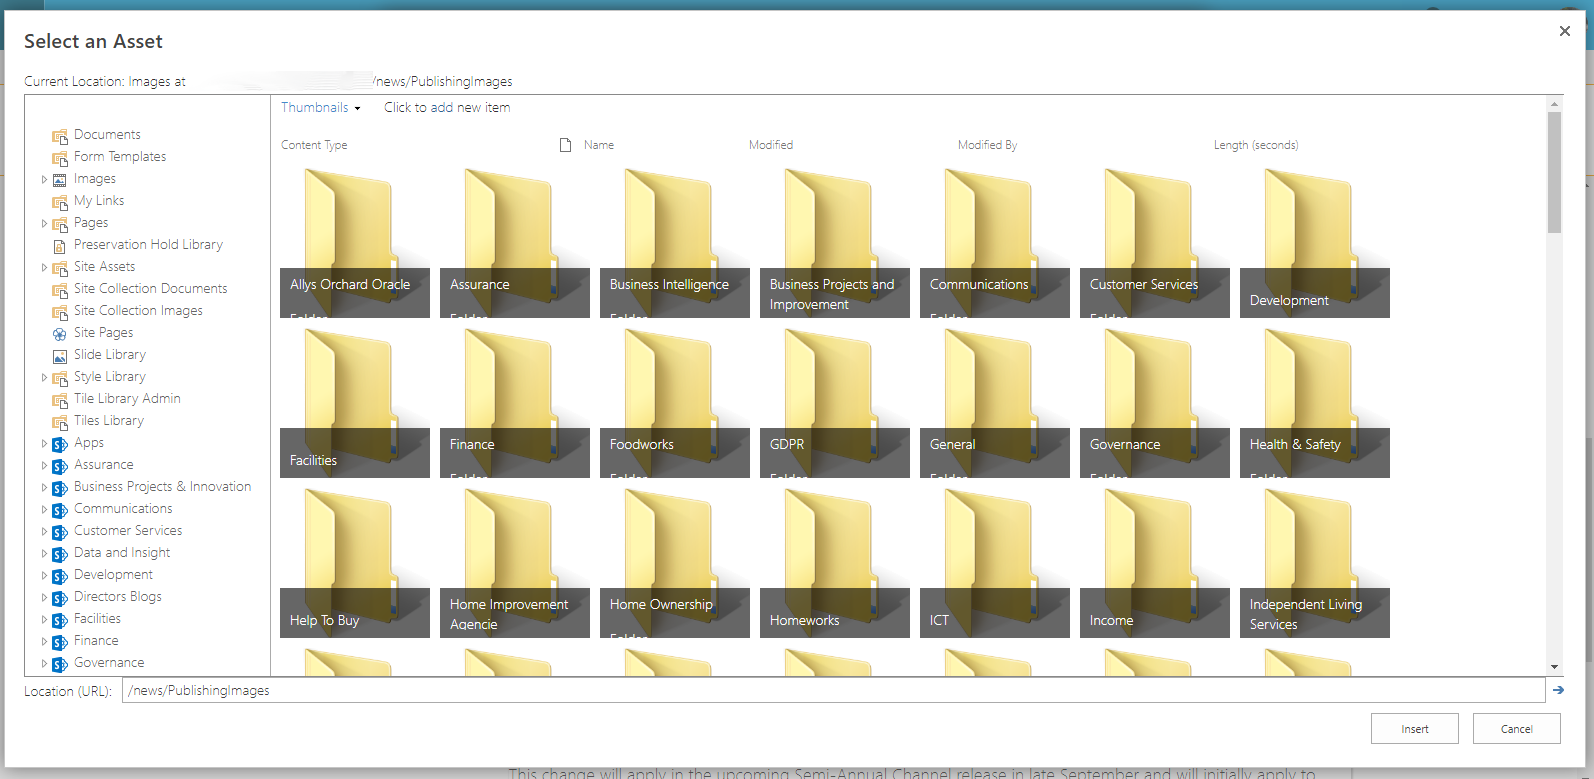
This doesn’t lead to a great user experience when you only want the users to be able to save into one location – sure you can try and get the message out to the thousands of staff members to only use the folders shown in the middle of the screen – but who actually listens!?
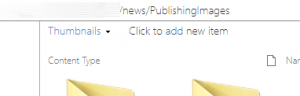
The second annoyance is the face the link to add a new item is so small and inconspicuous! I mean how many people are likely to easily spot that you need to click there to add a new item?
So after many hours of toiling with all of the possible ways of combating these two problems and the fact that Microsoft have locked down each of these functions there was only one solution I could come up with to fix the problem and make the Asset Picker only show the “Publishing Images” library of the actual site we specify.
So how do we do this?
What we will be doing is creating a script that will check on page load if the URL contains the name of the site we want the script to run on (in this case “news”) and that the current URL is actually the Asset Picker that is open.
To do that check we use the code below, changing the “news” bit to match whatever site name we want this to run on:
function sortNav() {
if (-1 < document.URL.indexOf(“news”) & -1 < document.URL.indexOf(“AssetPortalBrowser”)) {
var e = document.getElementById(“LeftNavigationAreaCell”).querySelector(“table”)
, t = $(e).siblings();
for (t[t.length] = e,
i = 0; i <= t.length; i++)
“TABLE” != t[i].nodeName && delete t[i];
checkDocItems(t, “News”),
upldBtn()
}
}
If you do not want to target a specific site name you could just remove that bit in red to become
function sortNav() {
if ( -1 < document.URL.indexOf(“AssetPortalBrowser”)) {
var e = document.getElementById(“LeftNavigationAreaCell”).querySelector(“table”)
, t = $(e).siblings();
for (t[t.length] = e,
i = 0; i <= t.length; i++)
“TABLE” != t[i].nodeName && delete t[i];
checkDocItems(t, “News”),
upldBtn()
}
}
The next bit of the code will iterate through all of the top level sites in the left hand navigation menu and delete them, excluding of course the site that we want to keep (“news”).
Once this is complete it will then run the function checkDocItems(t, “News”) which will iterate through the site “News” and keep only the library named “Images” – Note: you can update this to keep any other library name instead by changing “Images” to the name of the library as displayed in the navigation bar
Finally the function upldBtn() will run which will change the text of the “Add” link text to something more obvious (“UPLOAD NEW PICTURE” in this case)
So, how do we implement all of this?
Step 1:
Add the following code to a new JavaScript file (or one that is already loaded globally if you have one) and set the file to be loaded on every page by creating a new User Custom Action on the site collection you want it to run on (this should be set to automatically run on all subsites)
See the article below for details on setting up a new User Custom Action:
Add a new User Custom Action to a site collection in SharePoint
function sortNav() {
if (
(-1 < document.URL.indexOf(“news”)) &
(-1 < document.URL.indexOf(“AssetPortalBrowser”))
) {
var e = document
.getElementById(“LeftNavigationAreaCell”)
.querySelector(“table”),
t = $(e).siblings();
for (t[t.length] = e, i = 0; i <= t.length; i++)
“TABLE” != t[i].nodeName && delete t[i];
checkDocItems(t, “News”), upldBtn();
}
}
function upldBtn() {
null != (e = $(“#AddNewItemLink”)[0]) &&
null != e &&
“” != e &&
($(“#AddNewItemLink”)[0].text = “UPLOAD NEW PICTURE”);
var e = $(“#AddNewItemLink”)[0];
$(“#AddNewItemLink”).parent()[0].innerHTML = e.outerHTML;
}
function checkDocItems(e, t) {
for (dntDltMe = !1, i = 0; i < e.length + 1; i++)
if (void 0 !== e[i]) {
for (
countLinks = e[i].getElementsByTagName(“a”), x = 0;
x < countLinks.length – 1;
x++
)
countLinks[x].innerHTML.indexOf(t) <= -1 || (dntDltMe = !0);
if (0 == dntDltMe) $(e[i]).remove();
else if (((dntDltMe = !1), “News” == t)) {
var n = e[i].nextElementSibling.querySelector(“table”),
l = $(n).siblings();
(l[l.length] = n), checkDocItems(l, “Images”);
}
}
}
$(document).ready(function () {
sortNav();
});
Step 2:
And finally add the following CSS code to a CSS file that is already run globally across all files or add it to a new CSS file that you can add to be loaded to all pages with a new custom user action – this just styles the button for us
[css]
a#AddNewItemLink {
    -moz-box-shadow: inset 0 1px 3px 0 #00acff;
    -webkit-box-shadow: inset 0 1px 3px 0 #418ca8;
    box-shadow: inset 0 1px 3px 0 #418ca8;
    background-color: #418ca8;
    -moz-border-radius: 15px;
    -webkit-border-radius: 15px;
    border-radius: 15px;
    border: 1px solid #156d98;
    display: inline-block;
    cursor: pointer;
    color: #fff;
    font-family: Arial;
    font-size: 15px;
    font-weight: 700;
    margin: 10px 0;
    padding: 5px 11px;
    text-decoration: none;
    text-shadow: 0 -1px 0 #1c5f56
}
[/css]
Load up a new asset picker on the site in question and you will now see the left navigation bar has been stripped down to only the options you wanted and the button to add a new item is a lot more visible and more user friendly!


I love your blog.. very nice colors & theme. Did you make this website yourself or did you
hire someone to do it for you? Plz respond as I’m looking to
construct my own blog and would like to know where
u got this from. appreciate it
I don’t know whether it’s just me or if perhaps everybody else encountering problems with your blog.
It appears as though some of the written text on your content
are running off the screen. Can somebody else please comment and let
me know if this is happening to them as well? This might be a problem with my browser because I’ve had
this happen previously. Kudos
Hi, the whole thing is going fine here and ofcourse every one is sharing facts, that’s really excellent, keep
up writing.
Greetings! Very helpful advice in this particular article!
It’s the little changes that produce the largest changes.
Thanks for sharing!
This info is priceless. Where can I find out
more?
We’re a group of volunteers and opening a new scheme
in our community. Your site provided us with valuable
information to work on. You have done an impressive job
and our entire community will be grateful to you.
Thanks for sharing, but i want change only in form “AddNews.aspx”, I add code to form “AddNews.aspx” but do not work. Can you help me?
Hi Vo,
Thank you for raising this – I’ve updated the JavaScript which seems to have gotten scrambled during a website migration. Please update the code on your side and try again