


If you’ve ever come across the problem of not being able to access certain information outside of sharePoint then you’ll probably need to take a look at Microsoft Graph, the multi-platform API repository for connecting all of Microsoft tenancy services together with other internal and external services.
Let’s take the scenario of needing to use an Active Directory security group for setting and obtaining permissions without wanting to use a SharePoint group, why would you not want to use a SharePoint group you say? Well, in most environments the Service Desk or Helpdesk will have access to update AD groups but not SharePoint groups; they will also probably already have procedures in place for updating security groups when on-boarding a new user or someone leaves, so using an AD group instead of a SharePoint group in a situation were the users will constantly be changing is more efficient as it allows greatly control for the Service Desk and less need to constantly update SharePoint groups.
So, in this scenario we have a SharePoint system setup for manage an award system in the company – we’ve called this system our “Executives Award for Recognition” in the previous tutorials. In this system we have it setup to send out an e-mail containing links to each nomination to allow the members of a company panel of staff members the ability to vote on each nomination.
Now we have previously been using a SharePoint group to send out the e-mail, but as we already have a distribution list for that group within Active Directory we want to instead connect to Azure Active Directory and pull out a list of users that are stored within that group – in this example the group we will be working with is “Staff Forum Member”
So first things first we need to setup a method of connecting to Azure, to do this we need to follow a few steps, first we need to setup an app within each tenancy we need access to – this will be the app we use to prove we have access to the tenancy and what level of access we have.
Note: you may need a domain admin to help with these steps depending on your level of access
Step 1 – Setup App in tenancy
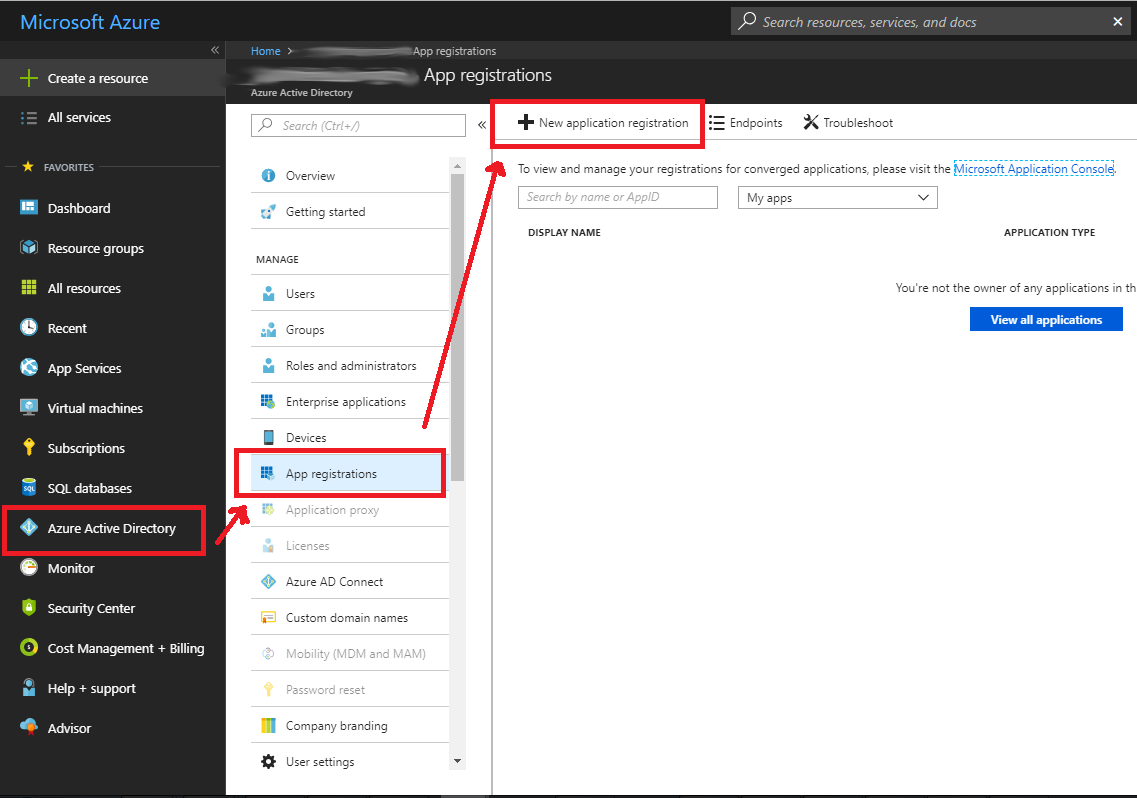
- Navigate to https://portal.azure.com
- Click on “Azure Active Directory” in the left menu
- Click on “App registrations”
- Click on “New application registration”
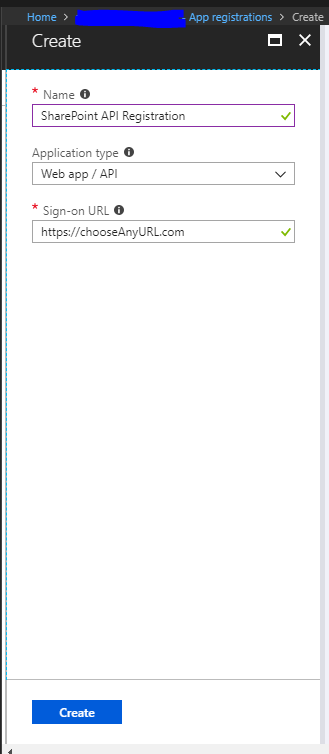
- Give your app a name – this is just for your reference and to make it easy to identify what it is used for
- As we are using a web API and not some software or services installed on a local machine we will be selecting “Web app / API” and not “Native”
- If you had a login page you were using (especially in the case of native apps) you could specify that here, as we do not have anything point this to your SharePoint tenancy home page “https://tenancy.sharepoint.com”
- Click on “Create”
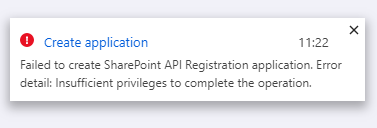
NOTE: if you see the below error message then you will need to speak to a domain admin to have them setup the app for you as you do not have permissions to create app registrations
Step 2 – Grant permissions to App
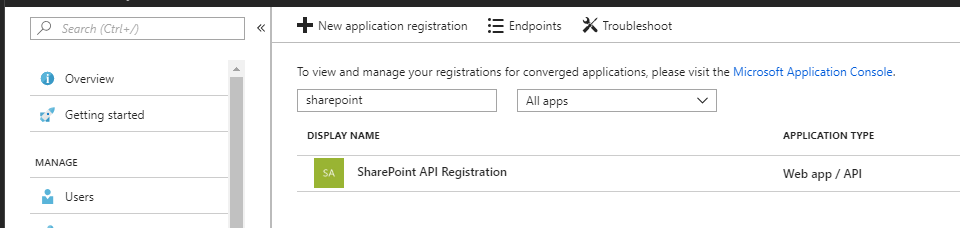
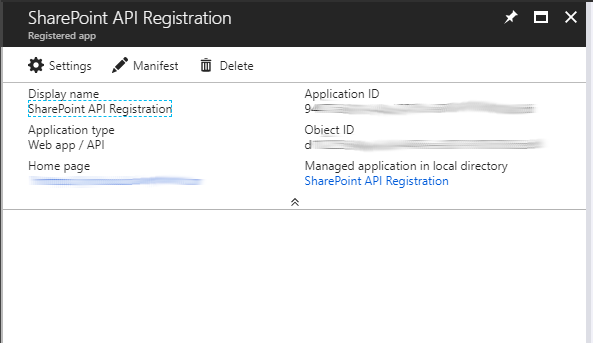
- In Azure portal go back in to App registrations via the Azure Active Directory menu and find the app you have just created and then click on the Display Name to open the menu for the app
- We will need the Application ID later on, this is important but for now click on “Settings”
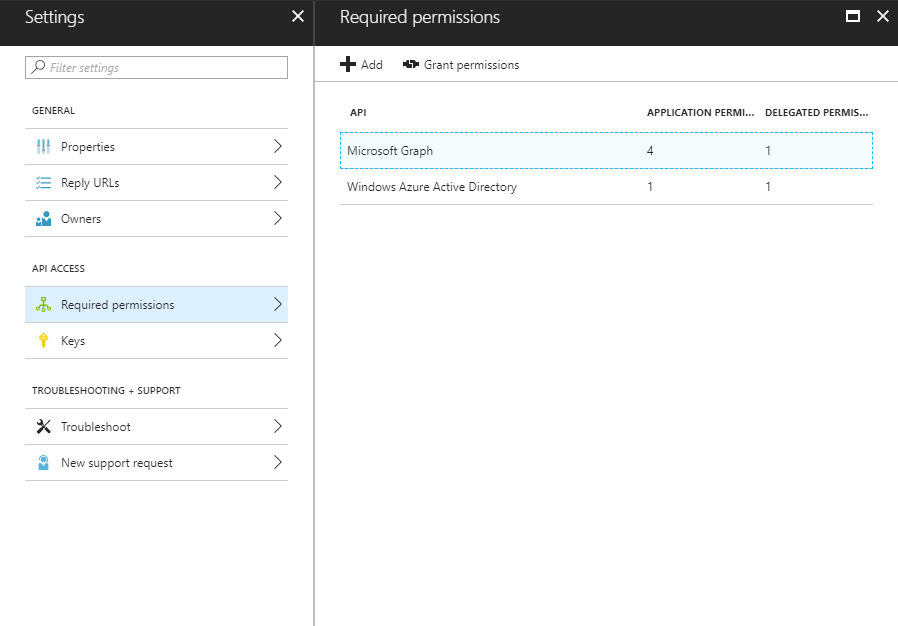
- Click on “Required permissions” and then click on “Add” then click on “Select an API” now find the option “Microsoft Graph”
- The next screen will ask you to set the permissions the app will need within Office Graph – in our situation we only need read-access to the Azure Active Directory service so we will choose the following options:
1 – Read all users’ relevant people lists
2 – Read all groups
3 – Read directory data
4 – Read all users’ full profiles - Now click “Save”
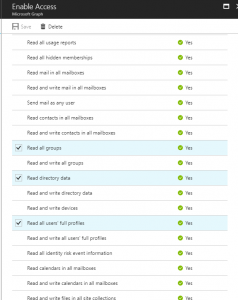
You may have noticed some of the options above say “Yes” with a tick under the column “Requires Admin”, this means an admin from the tenancy need to explicitly grant the app permission at least once to access those resources.
The easiest way to do this is to create a link that you can send the administrator to click on
Step 3 – Create a pass key (secret code)
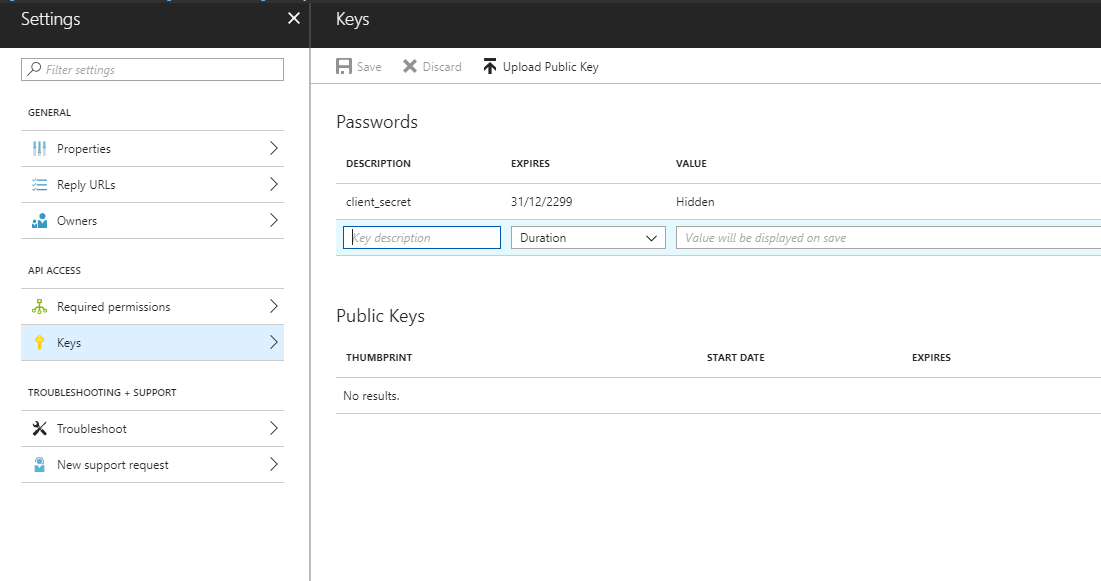
Now we need to create a pass key that will be used as a password for our App to access our tenancy(s), so back in the Settings screen for the App click on “Keys”.
In the Passwords section enter the text client_secret in description field, in the expires field select a duration for how long this password will be valid for before a new key has be generated and then in the Value field enter a new password to use (recommend using a random password generator like the one KeePass provides) – MAKE A NOTE OF THIS PASSWORD AS YOU WILL NOT BE SHOWN IT AGAIN AND CANNOT RETRIEVE IT IF YOU LOOSE IT
Step 4 – Connect to OAuth service
Next we are going to use OAuth to setup a connection to the tenancy to obtain a token that we can use to gain temporary access to the Graph API (Full details of this is available here at Microsoft docs), this works by creating a handshake with the Office 365 authentication service passing a client_id and client secret (this will be explained in a moment) then using these credentials the Office 365 authentication service will check if we have permission to access the resource, and if we do then it will send us a token we can use for all subsequent requests to the graph service.
The following steps all involve sending and receiving http requests so you will need some software to do this, my two favourite ones to use are PostMan and Fiddler – I will be using Postman for this article
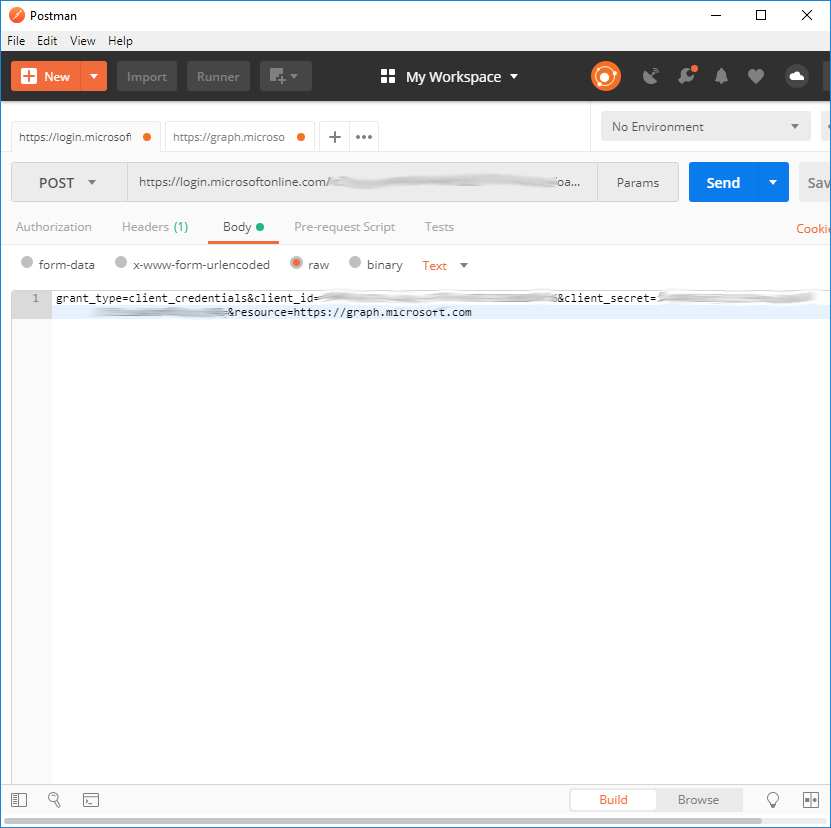
First we need a URL that we can send a POST request to to authenticate us against, this is in the format shown below:
https://login.microsoftonline.com/tenancyID/oauth2/token
Where can I get the tenancy ID from?
In Azure portal go back in to Azure Active Directory menu and then click on “Properties”, the tenancy ID is shown as “Directory ID” in the properties page and even has a handy copy button next to it

Second we will need to send some data in the body of the request, this will consist of four parameters
grant_type = this is always set to client_credentials as we are sending the credentials to be used
client_id = this is our unique App ID
client_secret = this is a unique pass key we previously created
resource = this is the service we are requesting the security access for
The format of the string is that shown below:
grant_type=client_credentials&client_id=YOURappID&client_secret=THISisTHEsecretPASSWORDinSTEP3=&resource=https://graph.microsoft.com
The headers will need to have the Content-type with the value application/x-www-form-urlencoded
[{“key”:”Content-Type”,”value”:”application/x-www-form-urlencoded”}]
Remember to set the HTTP request to POST, this is what Postman looks like:
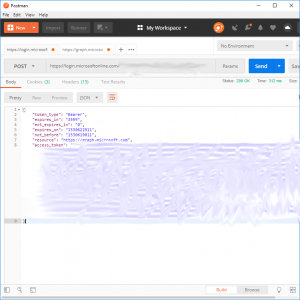
Now click “Send” and if everything was setup correctly you will receive a 200 OK response with some token details as shown below


Hey just wanted to give you a quick heads up. The words in your
article seem to be running off the screen in Internet explorer.
I’m not sure if this is a format issue or something to do with
web browser compatibility but I figured I’d post to let you know.
The layout look great though! Hope you get the problem fixed
soon. Kudos Ahaa, its nice discussion regarding this piece of writing at this place at this web site,
I have read all that, so now me also commenting at this place.
Your method of telling the whole thing in this post is
genuinely fastidious, all can simply be
aware of it, Thanks a lot. https://spdeveloper.co.uk
Good post. I learn something new and challenging on sites I stumbleupon everyday.
It will always be exciting to read through content from other writers and practice
something from their websites.
Hello! I could have sworn I’ve been to this site before but after browsing through a few of the articles I realized it’s new to me.
Anyhow, I’m definitely happy I stumbled upon it and I’ll be
book-marking it and checking back often! http://www.makaluagency.co.uk/hello-world/
Some truly fantastic information, Gladiola I found this.
Thanks for your marvelous posting! I really enjoyed reading it, you
might be a great author. I will make certain to bookmark your
blog and will often come back from now on. I want to encourage you to definitely continue your great work, have a nice day!
Wow, that’s what I was exploring for, what a data! existing here at this webpage, thanks admin of this web site.
Thank you for the blog post. Jones and I are saving for our new e
book on this subject matter and your post has made
us all to save the money. Your notions really resolved all our
concerns. In fact, a lot more than what we had thought of just before we came across your excellent blog.
Only a smiling visitant here to share the love
(:, btw great design and style. https://cryptorevoltreview.com/
Greetings from Carolina! I’m bored to tears at work so I decided to browse your blog on my iphone during lunch break.
I enjoy the info you provide here and can’t wait to take a look when I get home.
I’m amazed at how quick your blog loaded on my mobile ..
I’m not even using WIFI, just 3G .. Anyhow, good site!
What a material of un-ambiguity and preserveness of valuable knowledge
What’s up i am kavin, its my first time to commenting anyplace,
when i read this piece of writing i thought i could also make comment due to this
good piece of writing.
Today, I went to the beach front with my kids. I found a sea shell and gave it to
my 4 year old daughter and said “You can hear the ocean if you put this to your ear.” She placed the shell to her ear and screamed.
There was a hermit crab inside and it pinched her ear.
She never wants to go back! LoL I know this is entirely off topic
but I had to tell someone!
Hello my loved one! I want to say that this post is amazing,
nice written and come with almost all significant infos.
I would like to peer more posts like this .
What’s up, all the time i used to check webpage posts here early in the dawn, since i
enjoy to learn more and more.
Hello there! This post couldn’t be written much better!
Going through this post reminds me of my previous roommate!
He constantly kept talking about this. I’ll send this article to him.
Fairly certain he’s going to have a very good read. Thanks for sharing!